 Zyrox
ZyroxHow to Test a Power Supply Without Expensive Tools
A practical guide to testing a power supply with basic checks, visual inspection, and safe load testing without specialized equipment.
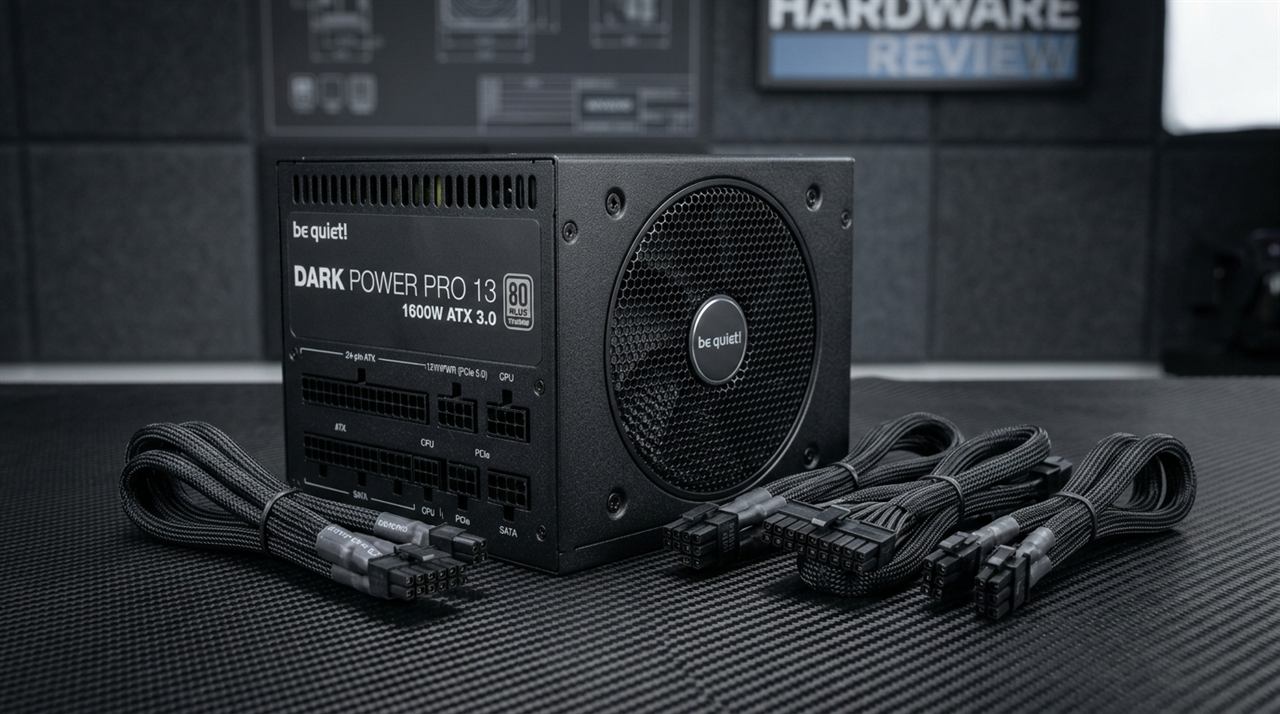 Last year I spent four days chasing a random reboot problem before I finally pointed the finger at the power supply. The system would run fine for hours, then cut out under load with no BSOD, no warning — just a hard reset. I tested the GPU, reseated RAM, checked thermals, and got nowhere. Swapping the PSU fixed it immediately. The thing that slowed me down was not knowing how to actually test a power supply with the tools I had on hand. This guide covers the full process from visual inspection to load testing, using nothing more expensive than a $15 multimeter.
Why PSU Testing Gets Overlooked
Power supplies are easy to ignore because they don't show up in benchmark charts or spec sheets. They're also not the first thing that comes to mind when diagnosing instability. But a failing PSU produces symptoms that look exactly like RAM issues, GPU problems, or even software bugs — because when the voltage rails start sagging, any component can misbehave. Testing the PSU early in your diagnostic process saves a lot of time.
Method 1 — Visual Inspection
The first test costs nothing and takes about five minutes. You're looking for physical evidence of failure.
Power off completely and unplug the PSU from the wall. Wait 30 seconds before opening your case. Look through the PSU fan grill with a flashlight. Check for heavy dust accumulation, which causes overheating, and look closely at the capacitors near the fan.
Inspect the external connectors, specifically the 24-pin ATX, the EPS CPU, and the PCIe power cables. Look for burn marks, melted plastic, or discolored pins. If you see melted plastic on a PCIe or 12VHPWR connector, it's a severe hazard. Do not use that unit again.
Life Safety Warning: NEVER open the metal casing of a power supply under any circumstances. Internal high-voltage primary bulk capacitors can hold lethal electrical charges (400V to 450V) for hours or even days after being disconnected from the wall. Only inspect what is visible from the outside through the honeycomb mesh using a flashlight. If you see bulging or leaking capacitors through the grill, condemn the unit immediately.
Method 2 — The Paper Clip Test (and the Zero-RPM Trap)
The paper clip test lets you jump-start the power supply without connecting it to a motherboard. It verifies that the unit's internal standby circuitry (+5VSB), soft-start logic, and primary switching circuits can engage.
- Unplug all modular cables from your PC components (motherboard, GPU, drives).
- Locate the 24-pin ATX main connector. With the plastic retaining clip facing up, locate the single green wire (Pin 16, PS_ON#) and any adjacent black wire (Pin 15, 17, or 18, COM / Ground).
- Bend an ordinary metal paper clip into a U-shape and insert one end into Pin 16 and the other into a Ground pin.
- Plug the AC power cord into the wall and flip the I/O rocker switch to ON (I).
The Zero-RPM Fan Trap: On many modern high-efficiency power supplies (Corsair RMx, Seasonic Focus/Vertex, be quiet! Dark Power), the fan features a semi-passive Zero RPM / Eco mode. If that physical rocker switch on the back of the PSU is turned ON, the fan will remain completely stationary at zero load, even though the PSU has powered on successfully! To avoid falsely declaring a healthy PSU dead, either toggle the Eco/Hybrid switch to normal/active mode, connect a sacrificial 12V 3-pin/Molex case fan to verify rotation, or verify rail output with a multimeter.
Passing the paper clip test only confirms that the PSU can turn on without a load; it provides zero evidence that the unit can maintain clean voltage when your GPU pulls 300 watts.
Method 3 — Multimeter Voltage Testing & The Power Good (PG) Signal
A standard $15 digital multimeter lets you test the actual DC voltage tolerances across every critical rail, as well as the motherboard handshake signal.
Turn your multimeter dial to DC Voltage (DCV 20V range). With the PSU running via the paper clip jumper:
| ATX Rail | Wire Color | Nominal Voltage | Minimum (-5%) | Maximum (+5%) |
|---|---|---|---|---|
| +12V1 / +12V2 | Yellow | +12.00V | 11.40V | 12.60V |
| +5V | Red | +5.00V | 4.75V | 5.25V |
| +3.3V | Orange | +3.30V | 3.14V | 3.47V |
| +5VSB (Standby) | Purple (Pin 9) | +5.00V | 4.75V | 5.25V |
| PWR_OK (Power Good) | Gray (Pin 8) | +5.00V | +2.4V (Logic High) | +5.25V |
Insert the black multimeter probe into any black Ground pin on the 24-pin block, and insert the red probe into each colored pin in sequence:
- Test +5VSB (Pin 9, Purple): This rail must output +5.0V even when the paper clip is removed and the PSU is merely plugged into AC power. If +5VSB is dead (0V or below 4.5V), the motherboard power button will never turn the PC on.
- Test the +12V Rail (Yellow): At idle with no load, a healthy PSU typically reads between 12.05V and 12.20V. If it reads 11.35V with no load attached, the internal transformer or feedback loop is degraded and will collapse under gaming loads.
- The Power Good (PWR_OK / Gray Wire, Pin 8) Signal: When the PSU switches on and its internal DC rails stabilize above 95% threshold, the supervisory IC sends a +5V logic signal down Pin 8 called PWR_OK. The ATX specification dictates this delay (known as timing parameter T3) must measure between 100 ms and 500 ms on legacy ATX 2.x units. In modern ATX 3.0 and ATX 3.1 standards, Intel tightened this to 100 ms to 250 ms (with 100–150 ms targeted for fast system initialization). If the delay is out of spec (or never rises to logic high), the motherboard keeps the CPU in a perpetual RESET state—resulting in running fans and LEDs, but zero POST display. Digital $15 PSU diagnostic testers with an LCD display specifically calculate this PG value in milliseconds.
Method 4 — Transient Excursion Testing (OCCT Power Stress)
In modern gaming PCs equipped with modern GPUs (NVIDIA RTX 30/40/50 series or AMD RX 6000/7000/9000), power supplies rarely fail during slow, predictable desktop workloads. Instead, they crash during microsecond transient power spikes. When a GPU suddenly switches from rasterization to heavy ray tracing compute, its instantaneous current draw can spike to 1.5× to 2.5× its rated TDP for 1 to 10 milliseconds.
If a power supply's primary bulk hold-up capacitors are degraded, or its Over Current Protection (OCP) / Over Power Protection (OPP) triggers too aggressively, the PSU triggers an emergency shutdown—instantly powering off the PC with no Windows BSOD.
To expose these marginal transients safely using software:
- Download OCCT (free for personal diagnostics).
- Navigate to the Power test module. Unlike ordinary synthetic benchmarks, OCCT's Power test simultaneously drives maximum AVX multi-threaded CPU instructions and max-power 3D shader compute.
- Run the test for 15 minutes while observing voltage graphs.
- If your PC instantly black-screens or shuts down within seconds of starting the test—yet passes Prime95 CPU-only and FurMark GPU-only individually—your power supply cannot handle the combined transient load or its +12V rail is dropping beneath the motherboard's undervoltage threshold.
Method 5 — Full Load Telemetry Analysis with HWiNFO64
If your system can boot into Windows with the suspect PSU, hardware sensor polling gives you continuous real-world electrical telemetry without probing pins manually.
- Launch HWiNFO64 in Sensors-only mode and scroll down to your motherboard sensor section (e.g., Nuvoton or ITE Super I/O chip).
- Locate the +12V, +5V, and +3.3V voltage rows. Note their "Current," "Minimum," and "Maximum" columns.
- Start a demanding 3D gaming benchmark (like 3DMark Time Spy / Steel Nomad, or Cyberpunk 2077 built-in benchmark) or launch Prime95 Small FFTs + FurMark simultaneously.
- Let the test run for 15 to 20 minutes while watching the Minimum column:
- Healthy Behavior: The +12V rail drops by no more than 0.15V–0.25V (for instance, dropping from 12.12V at idle to 11.92V under 500W load).
- Failing or Out of Spec: If the +12V rail drops below 11.40V (the official ATX minimum threshold), or fluctuates erratically by more than ±0.4V during load transitions, the PSU's voltage regulation module or output filter caps are shot.
- If the system suddenly restarts with Kernel-Power Event ID 41 (BugcheckCode 0) in Windows Event Viewer, the PSU tripped its internal hardware protection under peak wattage.
Method 6 — Swap with a Known-Good Unit
This is the definitive test. Borrow a working, high-quality PSU from a spare system or a friend, and install it in place of your suspect unit.
Run the same Prime95 and FurMark stress test. If your random reboots and instability completely vanish, your old PSU was the culprit. If the system still crashes with the known-good PSU, the fault lies with your motherboard, RAM, or GPU. There is no ambiguity with a hardware swap; it gives you a final verdict.
Audio Red Flags
Your ears are excellent diagnostic tools for power supplies.
Listen for severe coil whine. A faint high-pitched buzz under load is normal, but loud, piercing coil whine that just started happening can indicate internal components operating way outside their designed parameters.
Listen for clicking or crackling sounds from inside the unit (unrelated to the fan). This indicates mechanical stress, arcing, or an impending relay failure. If you hear crackling, shut the system down immediately. A grinding fan is less immediately dangerous electrically, but it means the PSU will soon overheat and fail if the fan dies completely.
When Visual Inspection Alone Is Enough to Condemn a PSU
You do not need to run a multimeter or stress test if you see certain physical signs.
If you see burn marks on any connector, cable, or PCB surface, the unit is dead. If you see melted plastic on a PCIe connector, it's a massive hazard. Bulging or leaking capacitors visible through the fan grill mean the unit is failing. If the unit makes a loud pop, produces a burning smell, or shows visible arcing near the power switch when turned on, unplug it immediately and replace it. No further testing is required.
Related Guides
← Back to home