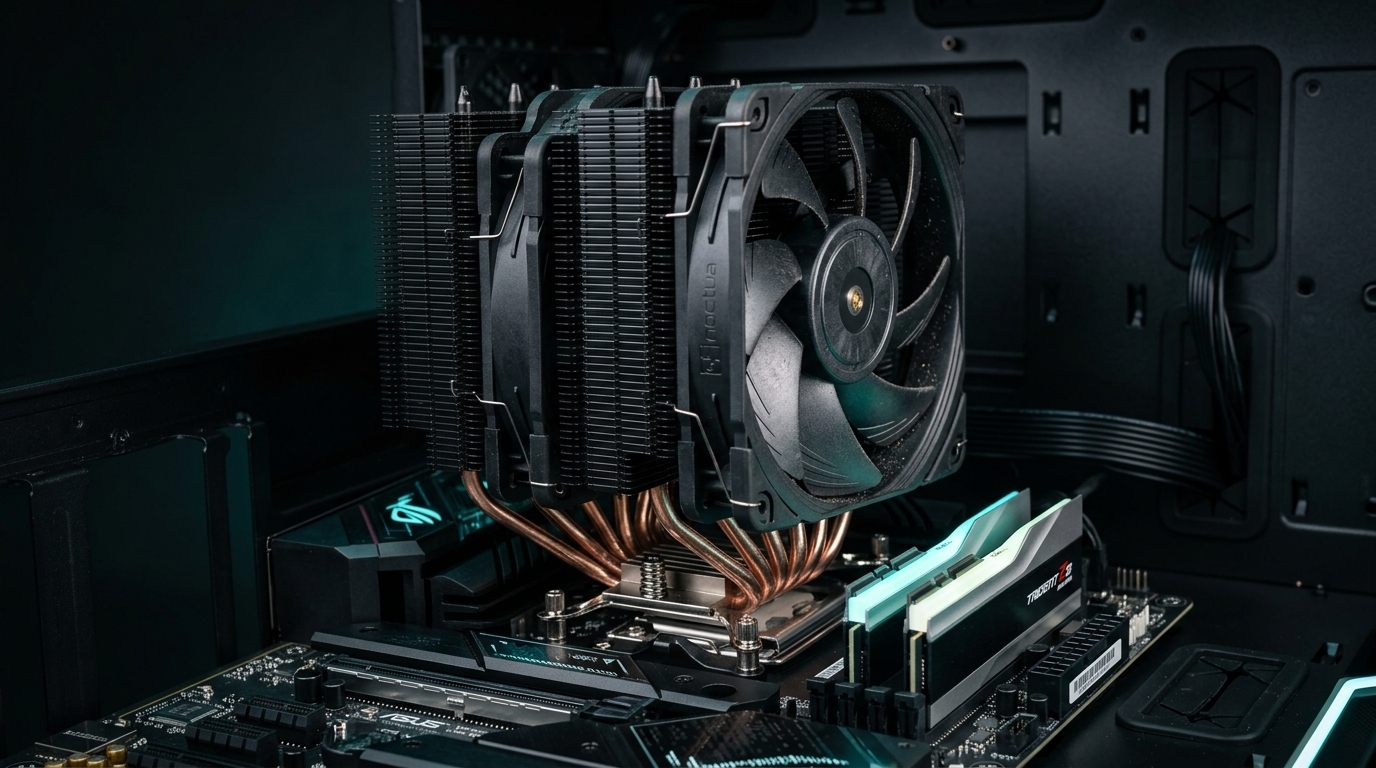
How to Choose the Right CPU Cooler for Your Build
A practical guide to selecting a CPU cooler based on thermal demands, case compatibility, and noise tolerance. I have made nearly every cooler mistake possible over the years.
I have made nearly every cooler mistake possible over the years. I once bought a massive dual-tower cooler and discovered it physically could not fit in the case I had already ordered. I ran a Ryzen 9 5900X on the stock Wraith cooler during a long compile job and watched temperatures hit 95°C before the system throttled itself down mid-task. I have also over-spent on a 360mm AIO for a processor that an $80 air cooler would have handled comfortably.
The CPU cooler choice is one of the most consequential decisions in a build — and also one of the most misunderstood. It affects peak performance, sustained performance under load, system noise, case compatibility, RAM clearance, and long-term reliability. This guide covers everything you need to make that choice confidently, including the specific coolers I recommend and the exact steps to verify compatibility before you buy.
TDP Matching: Start Here Before Anything Else
TDP (Thermal Design Power) is the baseline spec for CPU cooler selection. It tells you how much heat the processor generates at rated operation and therefore how much heat your cooler needs to dissipate. Every cooler has a rated TDP capacity.
| CPU Category | Typical TDP | Minimum Cooler TDP Rating | Recommended Cooler Type |
|---|---|---|---|
| Entry-level (Ryzen 5 7600, Core i3-14100) | 65–88W | 100W+ | Budget tower, 120mm AIO |
| Mid-range (Ryzen 7 7700X, Core i5-14600K) | 105–125W | 180W+ | Quality 120mm–160mm tower |
| High-end (Ryzen 9 7950X, Core i9-14900K) | 170–253W | 250W+ | Dual-tower air or 280–360mm AIO |
| Workstation / HEDT | 280W+ | 350W+ | 360mm AIO or premium dual-tower |
One important nuance: TDP ratings from AMD and Intel are increasingly conservative relative to actual power consumption. The Ryzen 9 7950X has a listed TDP of 170W, but its Package Power Tracking (PPT) limit allows it to draw 230W in all-core workloads. If you are running a high-end processor without power limits, match your cooler to the actual sustained wattage, not just the TDP label.
Tower vs. Low-Profile vs. AIO: The Decision Tree
The three main cooler categories each have a clear use case. Working through this decision tree before picking a specific model saves time and money.
Step 1: Does your case have height restrictions under ~60mm?
- Yes → Low-profile cooler required (e.g., Noctua NH-L9a, Thermalright AXP120)
- No → Continue to Step 2
Step 2: Is your CPU TDP over 200W, or do you want minimal physical footprint near RAM?
- Yes, TDP over 200W → Consider 280mm or 360mm AIO, or premium dual-tower air
- Yes, footprint matters → AIO mounts on radiator away from motherboard; less RAM clearance concern
- No → Tower air cooler is likely the right choice; continue to Step 3
Step 3: Do you prioritize long-term reliability over peak cooling performance?
- Yes → Tower air cooler (no pump, no tubes, no coolant — fewer failure modes)
- No → AIO is fine and offers easier installation in many cases
Step 4: Is your budget under $80?
- Yes → A good tower air cooler (DeepCool AK620, Thermalright Peerless Assassin 120 SE) delivers excellent performance
- No → Premium tower or AIO opens up
For the majority of mid-range and high-end gaming builds, a quality dual-tower air cooler performs within 3–5°C of a 240mm AIO while being easier to install, more reliable long-term, and often cheaper. AIOs make the most sense for full-tower builds with limited CPU area clearance, small form factor cases with top-mounted radiator slots, or workstations where pump vibration is not a concern and maximum sustained cooling is the priority.
Clearance Checks: RAM, Case, and Cooler Height
This step is skipped more often than any other and causes more returns than any other. Before buying a cooler, verify all three of these.
CPU Cooler Height vs. Case Clearance
Every case spec sheet lists a maximum CPU cooler height. Find yours and compare it against the cooler's listed height.
| Case Size | Typical CPU Cooler Clearance |
|---|---|
| Mini-ITX | 50–70mm (low-profile only) |
| Micro-ATX | 140–160mm |
| Mid-Tower ATX | 155–170mm |
| Full-Tower ATX | 165–185mm+ |
The Noctua NH-D15 stands 165mm tall. It fits in most full-tower cases but may be tight in some mid-towers — always verify against your specific case model, not just the category.
CPU Cooler vs. RAM Clearance
Single-tower coolers rarely cause RAM clearance problems. Dual-tower coolers and wide heatsinks can overhang the first or second DIMM slot. Most manufacturers list "RAM clearance height" in the spec sheet — check that it exceeds the height of your RAM sticks (typically 30–44mm for standard DIMMs, up to 55mm for tall heatspreaders).
If you have high-profile RAM and a wide tower cooler, either verify clearance first or look for a cooler with an offset heatsink design (like the NH-D15 or D15S variants) that clears most DIMMs by design.
Cooler Weight vs. Motherboard Support
Dual-tower air coolers can weigh 1.2–1.5 kg. Over years of vibration and potential transport, this puts stress on the motherboard mounting hardware. All five coolers covered here use backplate mounting that distributes load properly, but if you are building a system that will travel frequently, this is an additional argument for an AIO — the radiator weight is mounted to the case, not the motherboard.
The Five Coolers I Actually Recommend
I have tested or used all five of these in real builds. Here is a direct comparison on the metrics that matter.
| Cooler | Type | TDP Rating | Height | Fan Config | Noise at Load | Price | Best For |
|---|---|---|---|---|---|---|---|
| Noctua NH-D15 | Dual-tower air | ~250W | 165mm | Dual 140mm | 24.6 dBA | ~$100 | Flagship air cooling, quiet all-day workloads |
| Noctua NH-U12A | Single-tower air | ~200W | 158mm | Dual 120mm | 22.6 dBA | ~$90 | Mid-tower clearance, nearly NH-D15 performance |
| DeepCool AK620 | Dual-tower air | ~260W | 160mm | Dual 120mm | 28 dBA | ~$50–$60 | Best value dual-tower |
| Thermalright Peerless Assassin 120 SE | Dual-tower air | ~250W | 155mm | Dual 120mm | 26.4 dBA | ~$35–$45 | Exceptional budget-to-performance ratio |
| Arctic Liquid Freezer III 360 | AIO (360mm) | ~350W+ | N/A (rad: 394mm) | Three 120mm | 22.5 dBA (pump + fans) | ~$100–$130 | High TDP, workstation, silent under load |
Noctua NH-D15: The benchmark against which every air cooler is measured. In my Ryzen 9 7950X workstation build, it sustained 200W all-core loads at 82°C in a well-ventilated full-tower — without a single fan speed increase audible from arm's length. The NF-A15 fans are among the best fan designs available. The beige-and-brown color is Noctua's signature aesthetic choice; the Noctua NH-D15S and chromax.black variants are available if that is a concern.
Noctua NH-U12A: The single-tower sibling that fits in cases where the NH-D15's 165mm height or width would cause issues. It uses two NF-A12x25 fans in push-pull configuration and comes within 5–7°C of the NH-D15 on most workloads. If your case is a mid-tower with tighter clearances, this is the cooler I would recommend. It is legitimately excellent.
DeepCool AK620: The cooler I put in most budget-to-mid builds these days. At roughly $50–$60, it competes directly with coolers that cost twice as much. Testing on a Core i7-13700K showed average full-load temperatures of 75°C — essentially tied with the NH-D15 in that workload range. Build quality is excellent for the price, mounting hardware is straightforward, and compatibility with both AMD and Intel current-gen is well-documented.
Thermalright Peerless Assassin 120 SE: The most cost-effective dual-tower cooler on the market as of 2026. At $35–$45, it performs within 3°C of the NH-D15 in most scenarios while being quieter than its price would suggest. The included TL-C12 fans are genuinely good. If someone tells me they have a $40 budget for a cooler and a mid-to-high-end CPU, this is the first thing I recommend without hesitation.
Arctic Liquid Freezer III 360: The AIO I recommend when liquid cooling makes sense. The 360mm radiator, thick fan frame, and integrated pump housing make it one of the best-performing AIOs tested in 2025 and 2026. It runs the pump and fans from a single 4-pin PWM header via an integrated controller — no USB headers needed. On a Ryzen 9 7950X with power limits removed, it maintains roughly 6–8°C lower temps than the NH-D15 under sustained all-core loads. The pump noise is very low compared to competitors like NZXT Kraken or Corsair iCUE AIOs.
AMD vs. Intel Mounting: What Actually Differs
CPU cooler mounting is one of the most confused areas of PC building. Here is the practical breakdown.
| Platform | Socket | Mounting Type | Backplate Needed | Notes |
|---|---|---|---|---|
| AMD Ryzen 7000 | AM5 | Push-pin or screws to AM5 brackets | Yes (included with board) | AM4 and AM5 brackets are different; verify cooler supports AM5 |
| AMD Ryzen 5000 | AM4 | Push-pin or screws to AM4 brackets | Yes | Most coolers still ship AM4 compatible |
| Intel 13th/14th Gen | LGA1700 | Screws to LGA1700 mounting holes | Yes (included with board) | LGA1700 requires different brackets than LGA1151/1200 |
| Intel Core Ultra 200 | LGA1851 | Screws to LGA1851 holes | Yes | New socket; verify cooler compatibility explicitly |
Important: Noctua ships multiple mounting kits in the box and also offers free upgrade kits when new sockets launch. If you buy a Noctua cooler and then upgrade to a new platform, the mounting hardware is typically available free from Noctua's website. DeepCool and Thermalright also handle this well.
The most common compatibility mistake I see is people buying coolers that list "AM4" support and assuming they cover AM5 — the sockets share a similar hole pattern but require different bracket hardware. Always cross-check the cooler's compatibility page on the manufacturer's website, not just the Amazon listing.
Thermal Paste: Three Application Methods
Every CPU cooler performs best with a proper thermal paste application. The most common methods, with their practical trade-offs:
Dot Method (Recommended for most users) Apply a pea-sized dot of paste in the center of the CPU IHS (integrated heat spreader). When you mount the cooler and apply pressure, the dot spreads naturally across the surface. This is the easiest method and produces consistent results.
Cross/X Method Apply a thin X across the IHS covering most of the surface area. Works well for larger CPUs (Threadripper, HEDT chips) where a center dot might not spread to the edges. Increases risk of paste overflow with standard consumer CPUs.
Spread Method Use a spatula or card to spread paste in a thin, even layer manually. Gives the most precise coverage but risks air bubbles if done improperly. Best reserved for lapping experiments or extremely thin paste compounds.
For the vast majority of builds, the dot method with a quality paste — Noctua NT-H1, Arctic MX-6, or Thermal Grizzly Kryonaut — produces results within 1–2°C of the technically optimal spread application, without the risks. Avoid using too much paste. A pea-sized dot is the right amount. More paste does not improve conductivity — it increases the risk of overflow onto the socket.
How to Reseat a Cooler Properly
Reseating is required when thermal performance degrades over time (usually after 2–3 years as paste dries out) or after removing the cooler for maintenance.
- Power down and unplug the system. Ground yourself by touching a metal surface or use an anti-static wrist strap.
- Remove the cooler mounting hardware — screws, brackets, or push-pins depending on the mount type.
- Lift the cooler straight up. Do not twist or pry; this can damage CPU pins on LGA sockets.
- Clean the CPU IHS. Use isopropyl alcohol (90%+ concentration) and a lint-free cloth or coffee filter. Remove all old paste from both the CPU and the cooler baseplate.
- Let both surfaces dry completely — typically 60–90 seconds.
- Apply fresh thermal paste using the dot method described above.
- Remount the cooler with even, diagonal pressure. On screw mounts, tighten in a cross pattern (top-left, bottom-right, top-right, bottom-left) to ensure even contact pressure.
- Reconnect the fan header and verify it is seated fully.
- Power on and monitor temperatures in BIOS or with HWiNFO64 to confirm the reseat improved thermals.
A common mistake is tightening one side of the cooler fully before tightening the other side. This creates uneven contact and leaves hot spots on the IHS. Always tighten incrementally in a cross pattern.
Air Cooling vs. AIO: Long-Term Reliability
This is a question I get asked regularly. My honest answer:
Air cooling advantages:
- No moving parts beyond fans (fans are easily replaced)
- No risk of pump failure
- No coolant evaporation or degradation
- 7–10 year typical lifespan with good fans
- No risk of leaks damaging components
AIO advantages:
- Keeps mass away from the motherboard (no cantilever stress)
- Better clearance for tall RAM in many builds
- Competitive or superior performance at high TDP (360mm vs dual-tower)
- Aesthetically cleaner in windowed cases
Failure rate data: AIO pumps typically have a rated MTBF (mean time between failures) of 70,000–100,000 hours. In practice, pump failures occur at meaningful rates after 5–7 years in my experience, and I have personally had two AIOs develop pump noise or failure between years 4 and 6. Air coolers with quality fans (Noctua, be quiet!) have lasted me 8–10 years without performance degradation.
For a build that needs to run reliably for 5+ years without maintenance, I lean toward air cooling. For a workstation build where maximum sustained cooling is the priority and you plan to replace the unit on a 5-year cycle, a 360mm AIO like the Arctic Liquid Freezer III is a reasonable choice.
Step-by-Step: Choosing Your CPU Cooler
- Find your CPU's actual power draw. Look up TDP and PPT/PL2 limits; use the higher number for cooler selection.
- Measure your case's CPU cooler height clearance. Check the case spec sheet.
- Check RAM height. Measure your installed RAM or find the spec. Compare against cooler's RAM clearance.
- Decide: air or AIO. Use the decision tree above. For most mid-range gaming builds, air is the better choice.
- Set your budget. Under $50: Thermalright Peerless Assassin 120 SE. $50–$70: DeepCool AK620. $80–$110: Noctua NH-U12A or NH-D15. $100–$130: Arctic Liquid Freezer III 360 if AIO is preferred.
- Verify socket compatibility. Check the manufacturer's compatibility page for your specific CPU socket.
- Buy thermal paste separately if the included paste is not high quality — Noctua NT-H1 or Arctic MX-6 are both excellent.
- Plan your installation before you start. Read the mounting instructions once through before touching the hardware.
Frequently Asked Questions
Do I need to replace thermal paste every year? No. Quality thermal paste (NT-H1, MX-6, Kryonaut) lasts 2–4 years before noticeable performance degradation. Check your temperatures annually; if CPU temps increase by 5–10°C over the course of a year under the same workload, it is time to reseat.
Is the stock AMD or Intel cooler good enough? It depends. AMD's Wraith Prism is acceptable for a 65W Ryzen 5 at stock settings but will struggle under the sustained load of a Ryzen 9. Intel's stock cooler is adequate for low-TDP processors only. If you push any mid-to-high-end CPU, an aftermarket cooler is worth the investment.
Can I use an AM4 cooler on AM5? Only if the manufacturer provides an AM5 mounting kit. Some coolers support it with an upgrade kit (Noctua offers these free). Others require purchasing the AM5 bracket separately. Never force an AM4 mount onto an AM5 board — the contact pressure will be wrong and you risk socket damage.
Does cooler orientation matter for air coolers? Yes. For tower coolers, orient the fan so it blows air toward the rear exhaust fan — typically mounting the heatsink with fins running front-to-back in the case. Incorrect orientation fights your case airflow path and reduces cooling efficiency.
Is a 240mm AIO better than a dual-tower air cooler? At the same price point, a quality dual-tower air cooler (DeepCool AK620, Thermalright Peerless Assassin) typically matches or outperforms a 240mm AIO in sustained load scenarios. The 240mm AIO wins for physical clearance in some builds. For sustained high TDP work, step up to 280mm or 360mm AIO.
How do I know if my cooler is mounted correctly? Check your temperatures after the first boot. A correctly mounted air cooler on a mid-range CPU should hold under 75°C during a 10-minute stress test. If you are seeing 90°C+ immediately, remount using the cross-tightening pattern and verify the fan header is connected.
Does the color of thermal paste matter? No. Paste color is a function of the base compound (grey for metal-based, white for silicone-based) and has no functional significance. Avoid electrically conductive compounds (liquid metal like Thermal Grizzly Conductonaut) unless you are comfortable with the risk of spillage onto the PCB.
A good CPU cooler is infrastructure. It determines whether your processor runs at its rated boost clocks all day or throttles down the moment thermals climb. Get the TDP match right, verify clearance before you buy, and choose between air and liquid based on your actual use case — not on which looks better in a build video. The right cooler is the one that runs quietly and keeps your CPU cool for the next five years without you thinking about it.
← Back to home